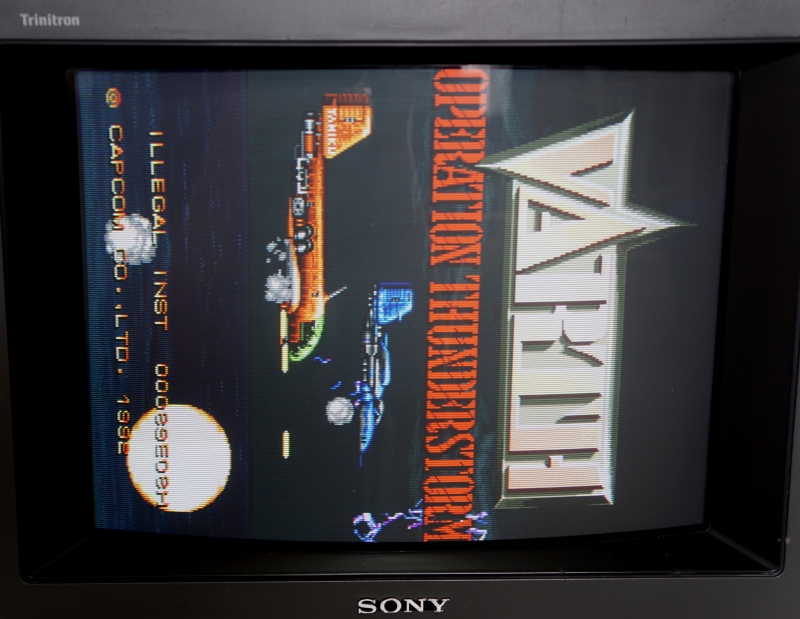
When your games go on the fritz - Suteneko's repair & mod thread.

Thanks! I thought about grabbing a 3rd party controller but the cheapest I found them was $10 shipped. For around $5 more I could buy an official S controller. Maybe I’m not looking in the right places. I recently purchased a starter soldering kit so this was also a good excuse to practice my soldering skills.

Thanks for the suggestion on the extension cables. I’ll keep that in mind if the other controller’s cables break. This was a fun project but I’ll stick with the S controllers for actual play. :grinning:

Always nice to have the authentic cords anyway imo. Nice work on the fix!

Finally decided to get around to fixing some of the broken consoles I had laying around. I picked up the Snes Jr recently and the regular Snes a while back. They were completely disgusting. Should have taken pictures of the snes jr. It was full off dead bugs.


I took all the shells off and let them soak in soapy water for about 30 minutes

I then cleaned the boards with alcohol, a tooth brush and and cotton swabs.

Both of them had broken power ports so I figured it was a good time to try out a desoldering iron I purchased on ebay a while back. This might be my new favorite tool. Desoldering the power ports took around 1 minute each. If you have desolder things like ports I can definitely recommend this. I paid around $15 for it.


I went to put new ports on but couldn’t find the ones I ordered months ago. I’ll have to order some more to finish the job. I decided to put them back together and they look way better. I don’t understand how people can let their stuff get so disgusting.

4 Likes

Great thread, guys. please keep posting. The cart surgery was awesome!

1 Like

Ristar ~ Sega Mega Drive Cartridge Repair ~

I picked up a cheap slightly tatty Ristar a few months ago but didn’t get around to testing it until yesterday and found that it refused to boot.

Upon opening up the cartridge you can see the cartridge connector pins are very dirty but cleaning them did not help at all and it still refused to boot.

Looking at the rear of the cartridge PCB you can see that there is some sort of moisture/corrosion damage to the solder and trying to re-flow the solder is not really an option as it crumbles when you apply any heat.

Since I am unsure if the Mask Rom still works and if the single capacitor was the culprit for the damage I remove both of them from the PCB:

I cleaned up the pins on the Mask Rom and to confirm it works I need to attempt to dump its contents.
Ristar uses a 42pin 16Mbit (2MB) Mask Rom which I found out is pin compatible with a M27C160 EPROM.

After setting my Top3000 Universal USB Programmer to M27C160 I read the Mask Rom contents and create a binary file dump which I then opened up in HxD:

However this binary file is unusable since Mega Drive ROM files are byte swapped and can not be compared to any known CRC from a good dump of the game.

Ristar_007

After using BINman to byte swap my binary dump the binary file becomes much more readable:

So now I load up the KEGA Fusion Emulator to confirm it works and it does!

I now know for sure my Mask Rom is good, but for good measure I check my binary dumps CRC which is “6511aa61” and an exact match for the No Intro “Ristar (USA, Europe).md”

I now used solder wick to remove all the bad solder from my cartridge PCB and using contact cleaner I cleaned up the PCB as best as possible:

Using my Multimeter I checked for continuity between the traces from the cartridge connector pins and the Mask ROM via’s which thankfully were all good. I also tested the 47uf 16v capacitor which was testing good for capacitance but I decided to replace it with a new one I had on hand just in case:

After placing the Mask Rom and new Capacitor in place I re-soldered them back in:

Now time to test it again:

Another success! :slight_smile:

10 Likes

Thanks for the kind comments @tron.

I did originally intend this thread just to be used for game cartridge repairs, but guessing I should just let it become a place for me (and others) to place their repair logs for anything video game related.

It is difficult for me to keep posting new repair logs as it is always preferable to not have to deal with broken games/hardware but if I see anything I want at a discounted enough price to make it worthwhile for me to attempt repairs I will.

That said I have a couple more older repairs I have not posted up logs of yet. So there IS more to come!

1 Like

This is the best thread. Keep saving those beautiful games.

I really need to get a proper set up so I can do some of this stuff myself. I have quite a bit of projects that are pretty simple just sitting around waiting for me to stop being lazy.

1 Like

Such dedication! I love it.

1 Like

SEGA System 16B - Shinobi Repair:

I recently had the opportunity to pick up this arcade PCB that I had wanted for a long time at a very good price. However it was listed as having sound problems and for some reason had been returned by a previous buyer. The only thing I had to go from was the following images:

So I decide to contact the seller to try to get some more information and got this reply:

I had it returned not working only to find the rom chip had be taken? So my mate replace it with a spare rom top left hand side the music works fine it just when it says Mission 1 and when you jump up a buzz noise comes on and goes off if my mate had a eprom programmer he can do it?

I could see that the suicide battery Z80 processor with sound encryption had been replaced by a regular Z80 and that position A10 on the ROM board had been changed to an EPROM that is labeled: Shinobi A7 Sound Fix.

This seemed a little odd. Was the wrong sound fix applied?

However I could see it was obviously booting from the provided photographs and while I was still dubious about its state and the story I decided to risk the purchase.

It arrived pretty quickly and indeed it had sound issues.

I could now see that the ROM PCB was a 5521 version and going from the Mask ROM positions I could deduce that this Shinobi was a Set 4 revision and this revisions suicide sound fix is a little different from the other game revisions and requires the non-encrypted epr-11361.a10 ROM from Shinobi Set 5 to work correctly.

I pulled the 27C256 EPROM from position a10 and dumped its contents with my TOP3000 USB universal programmer. The resulting binary had a CRC of 457A7CF which matches the CRC for the EPR11287.a7 decrypted sound ROM binary which is incorrect for this board!

So I erased the EPROM, then re-programmed it with the correct a10 code with a CRC of 1F47EBCB and now all the sound issues are fixed!

However…

To enable FREE PLAY on SEGA System 16B you need to push all 8 DIP Switches of DIP Switch 1 to on but after doing so the game was not booting into FREE PLAY mode so something else was up.

I turned on all the DIP switches on both DIP switches:

Then I proceeded to go into the Test Menu to check to see what Shinobi was reporting as working:

DIP Switch 1 switches 5, 6 and 7 were having issues and were reporting they were turned OFF still.

Flipping the board over I could see excess Flux that had not been cleaned up on the solder pads for both DIP Switches which leads me to believe that these have been tampered with at some point:

I used my multi-meter to test the continuity of all the turned on switches and they all reported back as good so the switches themselves are not the problem here.

I now suspected that there may be some broken traces underneath DIP Switch 1 and with the help of a SEGA System 16B schematic I found online I was able to tell that the DIP Switches connect directly to a resistor array 1 for 1 and then into a 74LS257 TTL IC:

Shinobi-DIP004

Fortunately after testing continuity between switches 5, 6 and 7 I found that the traces between the switch and the resistor array was broken, so using some Kyna wire I bridged the connections on the bottom of the PCB:

Not the cleanest job but good enough to test and we have success:

7 Likes

Brilliant! Well done. Must feel very pleased.

1 Like

CP System 1 B+C Board Repairs & Conversion:

I promised this a long time ago but unfortunately circumstances caused me to have to concentrate on other things and then I kept putting off writing up the repair logs for two different sets of boards until now (almost a year later…), so please excuse the in-consistent setups and backdrops to photographs.

I bought two CPS1 B+C boards as broken and not working from two different sellers mid 2019.

The first was a “Varth” B+C board:

Which looks like a dodgy “Yaton” conversion but more on this later.

The second was a “Knights of the Round” B+C board:

Which looked like it was missing 3 EPROM and possibly also suicided.

The repairs for both sets of these boards are a little intertwined so please bare with me.

2 Likes

CPS1 “VARTH” B+C:

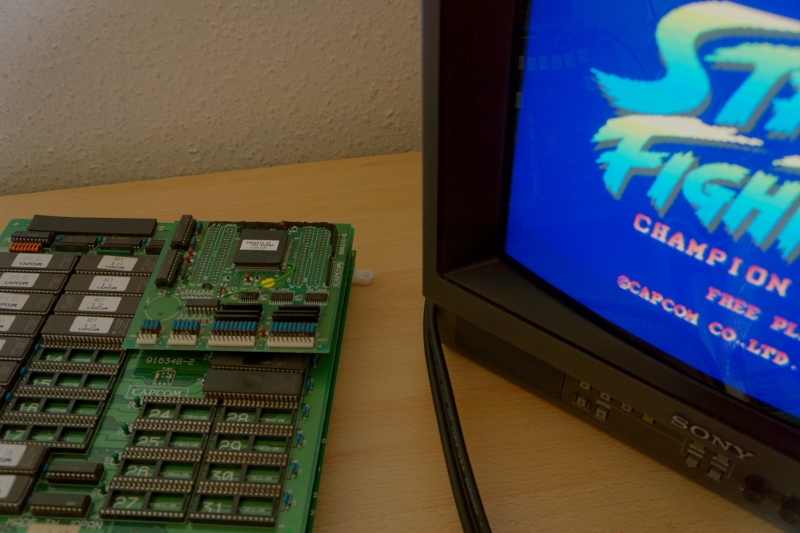
The first thing I did when this arrived was test it in my CPS1 DASH A Board that came with the Street Fighter 2 Turbo that I had purchased on a previous trip to Japan in Osaka:

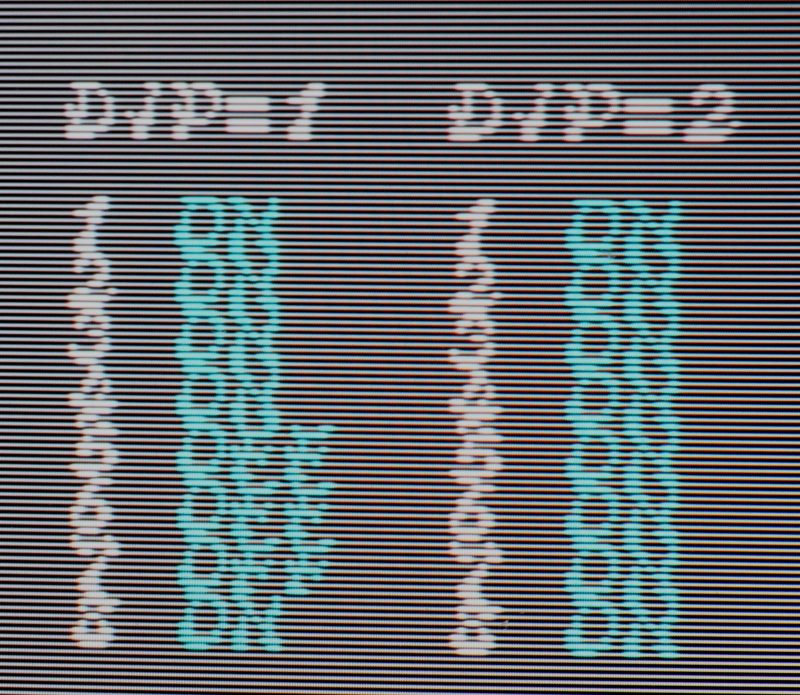
The game actually boots but randomly crashes with “ILLEGAL INSTRUCTIONS” or “ADDRESS ERROR” :

I dumped all the EPROM contents to compare them to the Varth sets found in MAME:

  1. Varth01.bin CRC: b1fb726e – Matches: va-5m.7a (varth.zip) – Graphics 512KB
  2. Varth02.bin CRC: 4c6588cd - Matches: va-7m.9a (varth.zip) – Graphics 512KB
  3. Varth03.bin CRC: 0b1ace37 - Matches: va-1m.3a (varth.zip) – Graphics 512KB
  4. Varth04.bin CRC: 44dfe706 – Matches: va-3m.5a (varth.zip) – Graphics 512KB
  5. Varth09.bin CRC: 7a99446e - Matches: va-09.12b (varth.zip) - Sound 64KB
  6. Varth18.bin CRC: de30510e - Matches: va_18.11c (varth.zip) - Sound 128KB
  7. Varth19.bin CRC: 0610a4ac - Matches: va_19.12c (varth.zip) - Sound 128KB
  8. Varth22.bin CRC: 0ed71bbd - No corresponding Binary ------ Program 512KB
  9. Varth23.bin CRC: fc0fac93 — No corresponding Binary ------ Program 512KB

This shows me that the program binaries are either bad or have been altered.

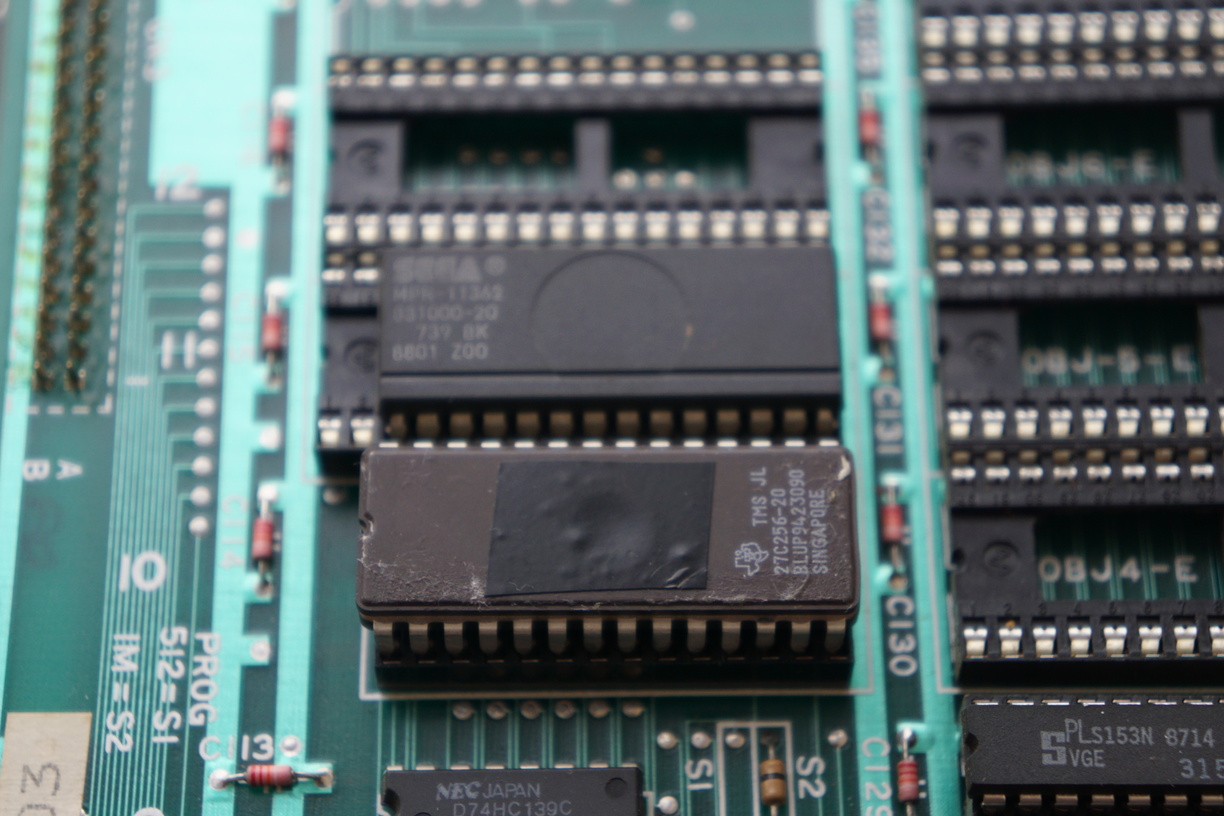
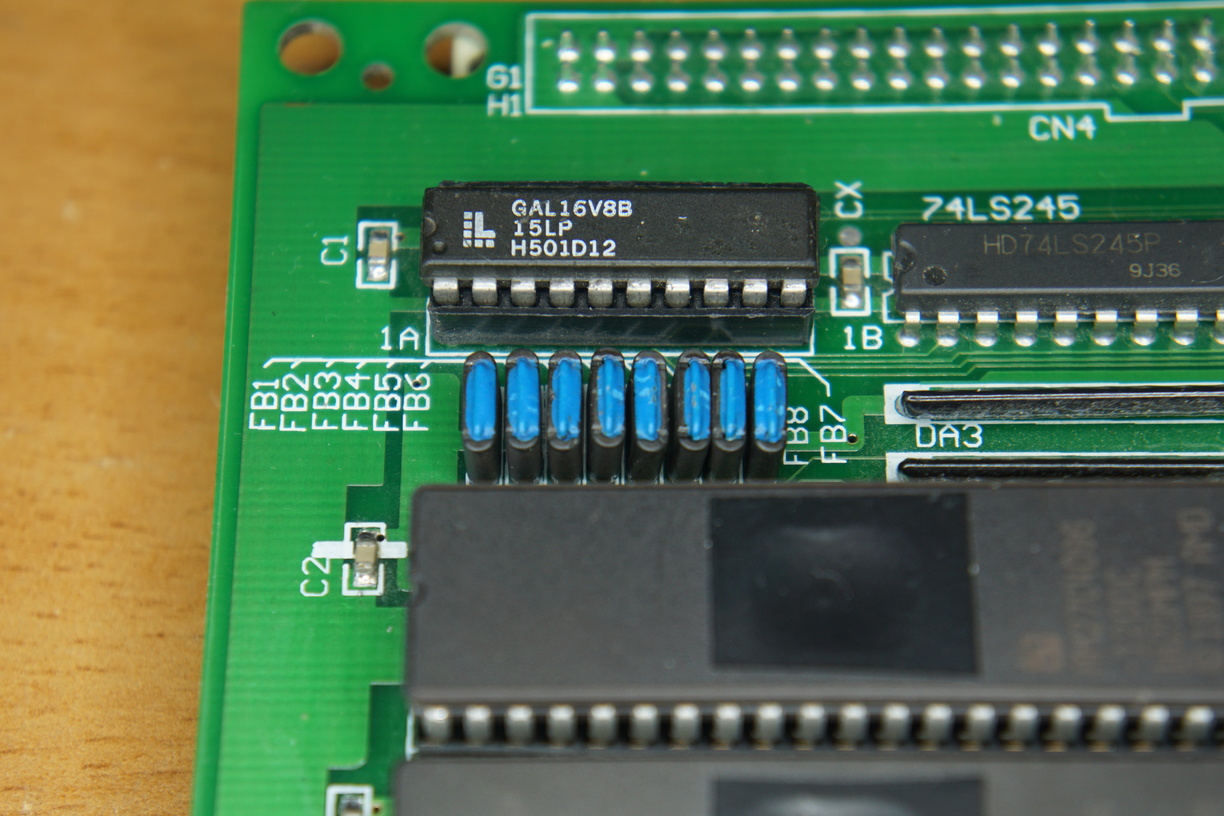
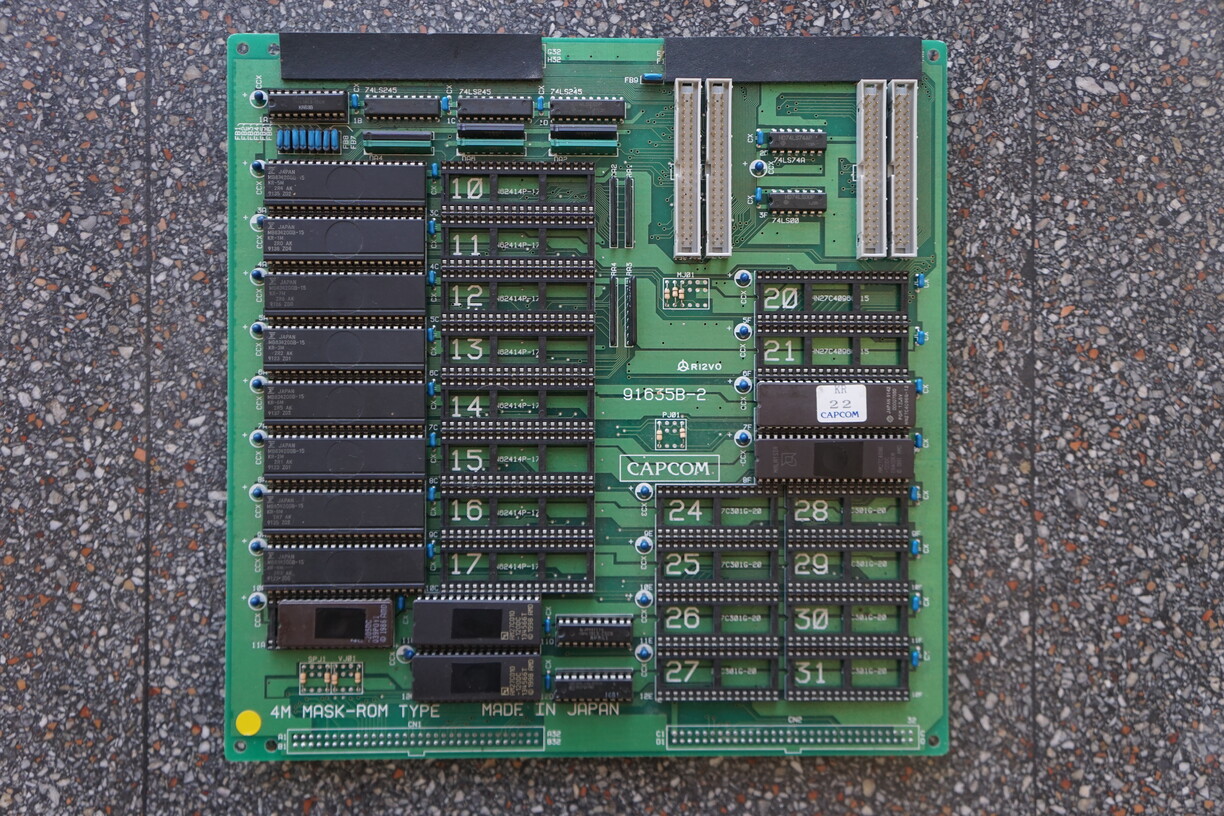
Looking at IC 1A which should be a PAL that controls memory addressing for graphics you can see that it has been replaced by a GAL and that two of its pins are not inserted correctly:

Also underneath this IC at position 1A there is a bodge line of solder bridging some pins together:

I remove this bridging solder and re-insert the GAL correctly and the situation remains the same with the game still booting but crashing.

I then checked and compare the IC at positions 1A, 11D and 12D.

  1. VarthGAL01A JED 3KB - Sadly I have no way to test or dump this GAL
  2. VarthGAL11D JED 3KB - Matches: BPRG2 PAL
  3. VarthGAL12D JED 3KB - Matches: I0B1 PAL

An original Varth should only be using two PAL IC on the B board which should be VA24B & LW10 and should be using a CAPCOM CPS-B-04 DL-0411-10005 custom IC and no PAL on the C board.

So let’s look at the C board now:

You can see this board has had its original battery removed and had a de-suicide mod done to it.

Looking a bit closer you can see that pin 45 and 46 that are normally connected to ground have been cut, soldered together and connected to a +5v source to pull them high which is the older de-suicide method to run the CAPCOM B-XX custom IC without its volatile registers.

I also noticed that pin 60 is bent towards pin 61 and looks like they are touching which I was very concerned about, however thankfully after testing these pins in continuity mode on my multimeter I found that they are not touching each other and thus not an issue.

I cleaned up the original de-suicide mod but changed the pull up +5v source to the positive side of a diode which is better practice. Then I removed the green sticker that was covering up the CAPCOM custom IC to find out that it is a CPS-B-21 and not the CPS-B-04 that Varth should be using.


I already suspected that this was a dodgy conversion done by the Chinese ebay amusement arcade reseller "Yaton" and the original intent was to figure out what was originally on this board and revert it to that game.

A “C” board with a B21 Custom IC with battery and IOC1 PAL IC would mean the only games this C board could have come from is:

  • Cadillacs and Dinosaurs
  • Capcom World 2
  • Punisher
  • Saturday Night Slam Masters
  • Quiz and Dragons
  • Warriors of Fate

However the “B” ROM board going from the EPROM IC sockets that are enabled could have only came from an original:

  • Street Fighter II World Warrior

Unfortunately this makes it so there was no “original” for me to revert these B+C boards to.

My only option now is to decide on a B21 conversion.

But first to ensure everything is good with both these B+C boards I removed all the EPROM and GALS and replaced them with ones from my Street Fighter II Turbo to see if it works perfectly and it does!


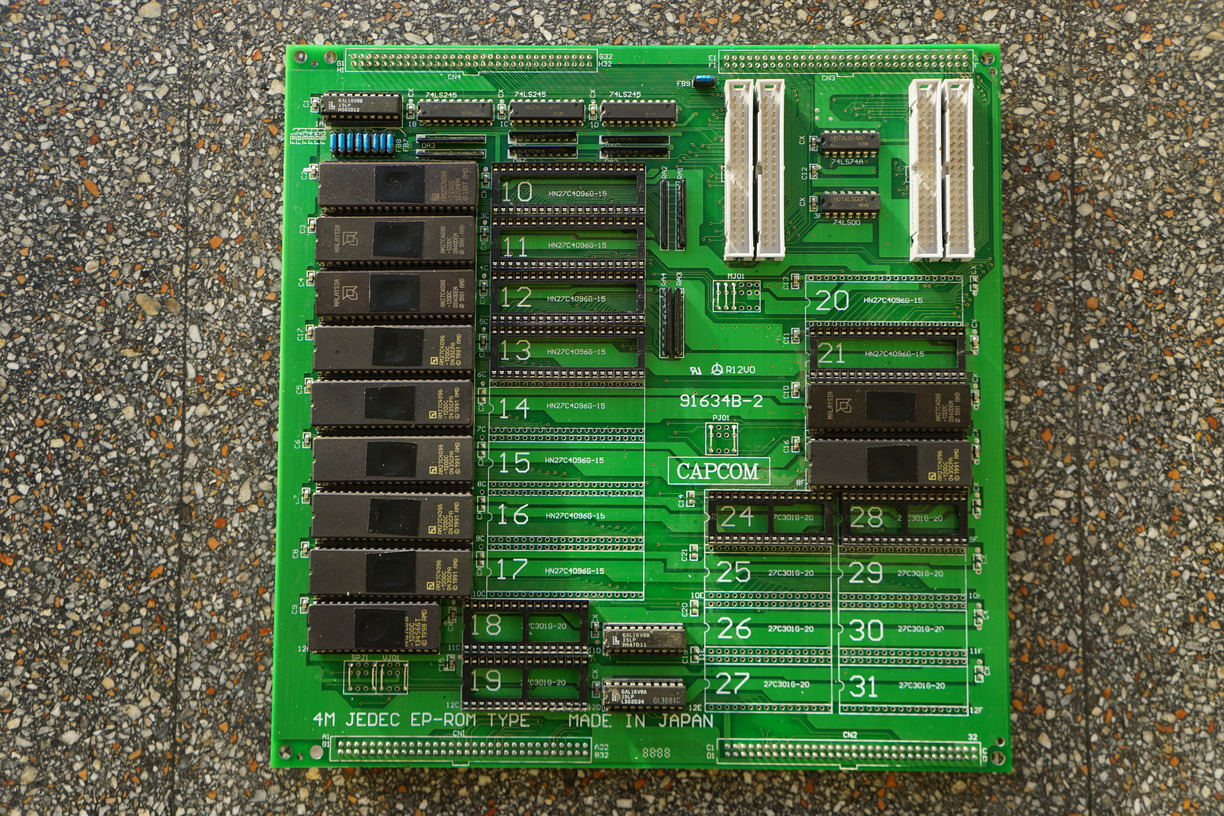
Looking more closely at the “B” ROM board you can see that all four sets of jumpers (MJ01, PJ01, SPJ1 & VJ01) are missing the resistors that are used to set whether the board uses JEDEC or non-JEDEC pinout for the EPROM:

The resistors CAPCOM use on these jumpers seem difficult to source in the necessary size.

Due to them just being Zero ohm resistors I could safely use any old jumper wire to set them correctly but I just used some old capacitor legs and set them to the same as on my SF2 Turbo B board for JEDEC EPROM:

You can find more information about these jumper settings here if you are interested.

Also missing from the B board was all its “EMI FILTER” Ferrite Beads.

Sadly again I’ve been unable to source any replacements for them and while the board will and does work fine without them it is far from ideal:

However, I was able to replace them by taking some from a faulty B21 C board at a later date:


Daimakaimura Conversion:

After some contemplation I decided to perform a conversion to “Ghouls and Ghosts”.

This game uses the CPS-B-01 Custom IC however a CPS-B-21 Custom IC is identical to it when it has no volatile registers used by some B21 games with batteries. So this de-suicided C board is perfect.

I programmed a GAL16V8B with the DAM63B.JED necessary for IC 1A.

Then using 10xAM27C4096 EPROM and a single AM27C010 EPROM, I program the binaries required and insert them into the correct sockets:

I re-inserted the C board and then placed these onto my CPS1 A board and finally get a working game:

I later contacted the seller to try to confirm my suspicions and to give him an update on the repair and got this reply:

I knew someone with eprom burning skills such as yourself would be able to do something with it and yes Yatons tomfoolery is fast becoming infamous. He never used to do this, equally his QC is awful.

I also asked about the A board that was being sold separately:

But to answer your question the motherboard was a mess. Hence why I sold it separately for spares.

There was some weird stuff going on to the motherboard. Stuff I couldn’t even fathom, capacitors soldered to other capacitors, heat sync missing, wires leading to components with little or no relation to each others function. It was like Frankenstein. I literally have no idea how or even why Yaton would sell it and list it as working? I do get the impression however, he’s a middle man these days for other people… may explain the lack of QC.

For those curious here is a picture of said CPS1 A board:

8 Likes

This is so cool. Keep em coming!

1 Like

I don’t even understand half that was told, but it FEELS awesome anyway. Too bad you couldn’t save Varth, since it is an amazing game.

1 Like

Just want to chime in and say how much I love this thread. I don’t understand half of it, but I feel like I learn a lot about how games work each time an update is posted.

1 Like

The photos provide a perfect respite from the heavy text. Nice work!

1 Like

What tools do you use? I do some very basic console repairs and mods and would really like to expand my skills.

1 Like

Knights of the Round CPS1 B+C boards:

Knights of the Round is a CPS1 title that has a suicide battery and we can see that the battery has been removed from the C board and that a typical de-suicide mod has already been correctly performed to run its Custom IC sans any volatile security registers.

Knights of the Round C board uses a CAPCOM B21 Custom IC and IOC1 & C632 PAL IC which are identical to those on Street Fighter II CE/Turbo which uses a stock non battery B21, so I can easily swap over the C board onto my Street Fighter II CE B board to quickly test it:

It appears to be working so we can move over to the B board:

By checking MAME I can confirm that this Knights of the Round is missing two audio data EPROM from IC sockets 18 and 19 as well as missing a program data EPROM from IC socket 23.

Since this boards jumpers are set to JEDEC I will need to program two 27C010 for the audio and a single 27C4096 to replace the missing EPROM:

Before I program anything I use my Top3000 universal programmer to dump the contents of the program EPROM at IC socket 22, which matches the CRC of the kr_22.7f binary file from the ETC/World/US version of Knights of the Round MAME ROM set and I also dump the contents of the 27c512 in IC Socket 9 which should be audio data but appears to be corrupt and mostly blank, likely from its EPROM window not being covered and long exposure to UV light.

I completely erase the 27c512 and using the appropriate files from the MAME knights.zip I program it and the two new 27c010 with the correct audio data. However, since the B21 no longer as the volatile security keys in its memory I have to source decrypted program ROM files for the game which along with a lot of other games can be found at The Dead Battery Society.

Thankfully Knights of the Round only requires PROG ROM 23 to be decrypted so I can leave PROG ROM 22 as it is. The only unfortunate thing is that there is only a decrypted file available for the US version of this game, so I can’t get the European version that is missing the “Winners don’t use drugs” screen.

I then insert these newly programed EPROM back into the B board:

I re-insert the C board that came with this B board and test it and the game now works:

However… during playback I start noticing graphical issues, which is most noticeably affecting health bars:

And white dots around text on the character select screen:

When I originally tested the C board on my Street Fighter II CE I didn’t bother to test past the intro screen, but when I placed it back onto it to re-test it and started playing it a little, I was finding that with this C board Street Fighter II CE was also displaying odd graphical issue such as black dots above health bars:

And messed up chain fence on the Spanish stage:

From this I know that the Knights of the Round C board is bad. Both the IOC1 & C632 PAL IC are testing good and the other IC on the board only deal with additional inputs from the kick harnesses, so the only cause of the issue can be the CAPCOM B21 Custom IC which can not easily be replaced…

Placing my Street Fighter II Turbo B21 C board (and the one I used for Ghouls and Ghosts that has no kick harness for the extra buttons required for Player 3 inputs) results in perfect playback with no graphical issues:

So for now I have a broken C board that sort of almost works but since I have two spare compatible C boards I can swap them over for the moment when I wish to play Knights of the Round.

Not quite the result I had hoped for but good enough and the Ferrite Beads I had required for the B board that became Ghouls & Ghosts were donated from this C board so not a total loss.

2 Likes

@Danexmurder, @Shinriji, @aidan and @matt thank you for your kind comments.

I try to make everything as easy to follow as possible and take as many pictures as possible to show what is being done, so if something isn’t clear or you want anything explaining happy to try to help.

My main tools are:

Hakko FX-888D Soldering Iron
Hakko SPPON Manual Solder Sucker
Fluke 15b+ Multimeter
Mitutoyo Digital Vernier Caliper
TOP3000 Universal USB Programmer
858D (Clone) Hot Air Rework Station
Duratool D00672 80W Desoldering Gun

I would prefer to have a legitimate Hakko 858D hot air rework station and a Hakko FR-301 desoldering gun but I just can not justify the prices for the use they would get.

Surprisingly the Duratool desoldering gun has proved to be a very good and reliable tool for me and is the most recent tool addition. All desoldering work shown thus far in this thread was all done with the Hakko SPPON by hand and was rather slow work even after getting the “knack” for using it.

I highly recommend MG Chemicals for Solder, Wick and Flux.

2 Likes

Great tips here! I always love seeing what other people use for tools as well. I do a bit of console repair/mods and have dabbled in arcade stuff a bit myself. Mostly just doing infinikey installs in CPS2s although I did do one of the CPS2 HDMI mods. It’s a ton of fun!

The part where I have a LOT to learn is on the programming/flashing side of things. So far I’ve only done any of that type of things to my NESbRGB board. I think I need to set up a small dedicated PC at my workbench so I can start doing more work like you are doing here. I’d love to get into repairing and reviving old arcade games. Do you have any good resources for learning how to do things on that end?

Keep up the great work!

1 Like