Official 360 to XBOX Component Cable Mod:
Last year I ended up being given a couple of Xbox consoles for free that had issues and I’ve spent quite some time figuring out how to mod, refurbish and repair them.
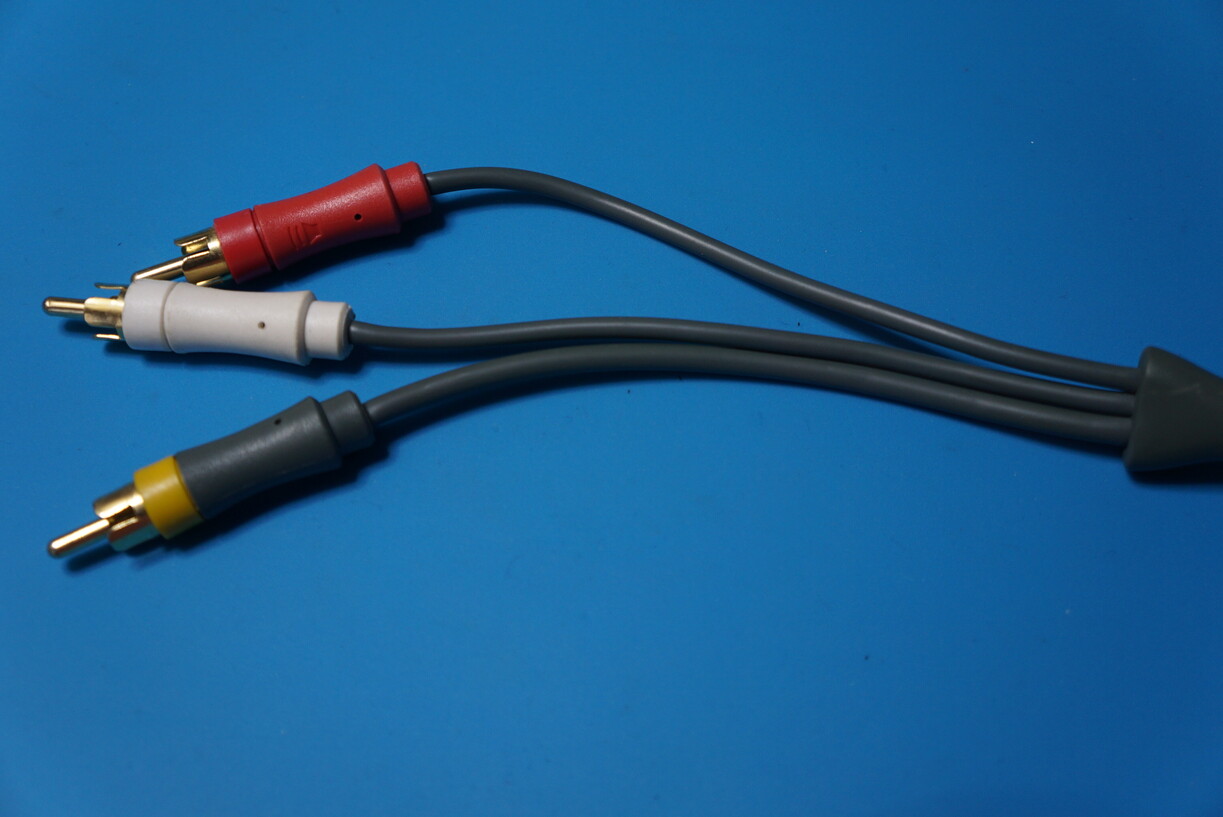
For quite some time I was using a cheap and nasty component cable sourced from China:

These have no shielding in them at all and pick up interference easily and internally the grounds are not even connected…
Unfortunately the Official Xbox Component Cable is hard to come across.
There is another option with the Microsoft Xbox One High Definition AV Pack:

These have become rather expensive to buy and you still have to ensure you purchase high quality shielded component and RCA Audio cables to connect your display to.
However, I discovered that the official 360 Component Cables are very cheap, very high quality and relatively easy to modify to work with an Xbox.
There does however appear to be two variations of this cable one with a ferrite bead and one without:


I fortunately got given one of each type for free by an acquaintance who had no use for them.
Just as a note I found the one without the ferrite bead is a LOT easier to work with.
Let’s start!
First we need an XBOX connector which we can take from a cheap Chinese Component Cable like the one previously pictured (which I used), but you can also take one from an Official XBOX Composite Cable.
To start we cut off the connector from the cable and then throw the cable away, leaving us with:

Using a flat metal pry tool we can pry up the black plastic housing:

We can then wiggle the housing off backwards:

Then using some pliers we can open up the housing that is tightly gripped around the cable:

The two metal pieces then will easily separate and you can pull out the connector:

On these cheap Chinese cables the solder connections have hot glue covering them and I used some needle nose tweezers to carefully remove all of it:

Now we can de-solder the wires from the connector apart from the 2 red wires that loop back onto the connector as they control the cables mode select for the XBOX:

On the larger piece of metal housing you now want to rough up the surface with a file slightly:

and then attach a blob of solder to it, while being very careful not to let the solder go up against the side of the connector as it will not close back up correctly, so make sure to leave a few mm of gap:

Our initial preparation is now complete.
We now need to break open the connectors on the official 360 Component cable, de-solder/remove the small PCB that is used to output digital audio and then de-solder all the wires from the connector.
This will leave you with a bare cable end.
The cable without the ferrite core:

The cable with the ferrite core:

As you can see the shielding is a lot nicer and needs less tidying up on the cable without the ferrite bead and even has slightly thinner ground wires which are easier to solder to the connector, however overall the cable with the ferrite bead has the better shielding but is much more of a pain to work with.
Now going back to the black plastic housing, you will most likely find that the hole is slightly too small to fit over the 360 cable. So using a round file lightly file the cable strain relief:

Until you can easily slide it over the cable:

If you are using the cable with a ferrite bead which you wish to keep and not cut off the cable shorter you will need to cut the cable strain relief off shorter at the first notch as such:

Clean it up either with a file or linishing paper and push it all the way back to the ferrite bead. This will just barely give you enough room to work with:

On both cables you will want to slightly trim the cables back to all the same length and so no wire is exposed and clean up the shielding if it is messy:

The yellow wire is not going to be used so cut this off as far back as you can but make sure to keep its attached ground wire in tact.
With a wire stripper you should strip a couple of mm off the cleaned up wire ends (I found the 18AWG setting to be suitable) and tin these ready to hook them up to the salvaged XBOX connector.
We now need to know the XBOX connector Pin out which I have taken from gamesx:

We only care about the ones below:
01: Audio Right
02: Audio Right Ground
09: Pb (Blue)
10: Pb (Blue) Ground
11: Y (Green)
12: Y (Green) Ground
14: Audio Left
15: Audio Left Ground
21: PR (Red) Ground
22: PR (Red)
If you are using a different type of connector you will need to set the correct mode select pins by wiring:
Pin 6 to Pin 18 and Pin 7 to Pin 19
Thankfully the 360 cables wiring is nicely and appropriately colour coded for us:
White = Audio Left
Red = Audio Right
Pink = Red
Green = Green
Blue = Blue
Black = Ground
Yellow = Composite Video
So now we simply solder all these wires to the appropriate position on the connector:


We will have one single ground wire left over:

Slide the connector partially back into the metal housing and solder this ground to the point you filed earlier:

You can now fully push in the connector into the metal housing and put back on the second part of the metal housing and using your pliers close back together the prongs tightly over the cable.
This is where you will struggle the most on the cable that has a ferrite bead on it as you have virtually no space to work with even after cutting the cable relief shorter:

You can now slide the black plastic housing back over the metal housing to complete your cable:

OPTIONAL:
We are not quite finished yet though!
The 360 cable has a Composite Video RCA connected to it:
Since this can no longer be used, we want to cut it off as close to where the audio RCA wires come off the cable. Using a file clean up around the hole and we can use some epoxy putty to nicely finish this off:

The results:


It is hard to show the improved clarity from a photograph of a CRT but it is much better.
I have a lot more XBOX modding/refurbishment posts to come in the near future!