This post has been a loooooong time coming. Way back in September of 2020 our very own @Sapiens sent me a very special console to do some work on for him. He sent me his RG-M1 Wondermega by Victor. It’s one of the coolest and most complex pieces of Retro gaming hardware around.

Sapiens told me that this unit was having power issues. It would take minutes to warm up before switching on and when I tested it the lid would have trouble opening. The lid LEDs would flash and the door would move sporadically as it opened.
It was time to crack this bad boy open and take a look.

As you can see it was going to be a big job. Just disassembling this unit was a challenge. The Wondermega consists of 4 main boards and several smaller sub-boards that control things like the LEDs.
The main one here you can think of as the Mega Drive side of the unit. It contains all of the chips that would be on a regular mega drive or Genesis, the cartridge connector, and the 4 voltage regulators and giant heat sinks that power all this hardware.

This is the Mega CD board and Karaoke board. They actually pull out of the console together in one unit.

This is the Mega CD board.

And this is the Karaoke board.

This is the AV board. It natively supports S-video and Composite.

After inspecting everything I could see that there were a few bulged caps (not pictured) but nothing leaky. I also determined that it would be a good idea to replace the four voltage regulators due to how hot this area of the console gets during operation and the power issues it was having.

This is where our story takes a huge left turn. After turning the console back on to test it the PCM audio was gone… there was no bios music when I turned in the console. PCM audio was missing from CD games too. Oh no.
I’m not 100% sure what happened but my theory is that the PCM chip had gotten “used” to getting weaker voltage from a stressed out regulator. When I put the fresh ones in it got a full load and with having operated out of spec for who knows how long it decided to give up the ghost.
Regardless I now had a major repair job on my hands.
Up to this point I’ve fixed up a handful of consoles. A couple bad regulators here and there, replaced some caps, fixed some traces. But that was all stuff that was easy to measure, logic my way through, or physically see. This was something else entirely.
There is NO documentation available out there for this particular unit. You can find some things for the X’eye and the OTHER version of the Wondermega but this one had me against the ropes.
When I started this repair, I didn’t have a rom cart, an oscilloscope, or a logic probe. I also didn’t have twitter. (We’ll come back to that.) I was at a loss. I didn’t know what to do.
I contacted Sapiens to let him know what was going on and hats off to him. He has the patience of a saint. He let me keep poking at it in between jobs. For years.
I asked around on the console repairs sub reddit without much luck. I looked at manuals where I could and watched videos of repairs of other units but up to now nothing was shaking loose.
Then a week or so back I happened upon a repair thread by Aergan over on twitter.
Seeing how he reasoned through his repairs was incredibly helpful. I started asking questions and things started shaking loose. After years of little progress now I was starting to get some where!
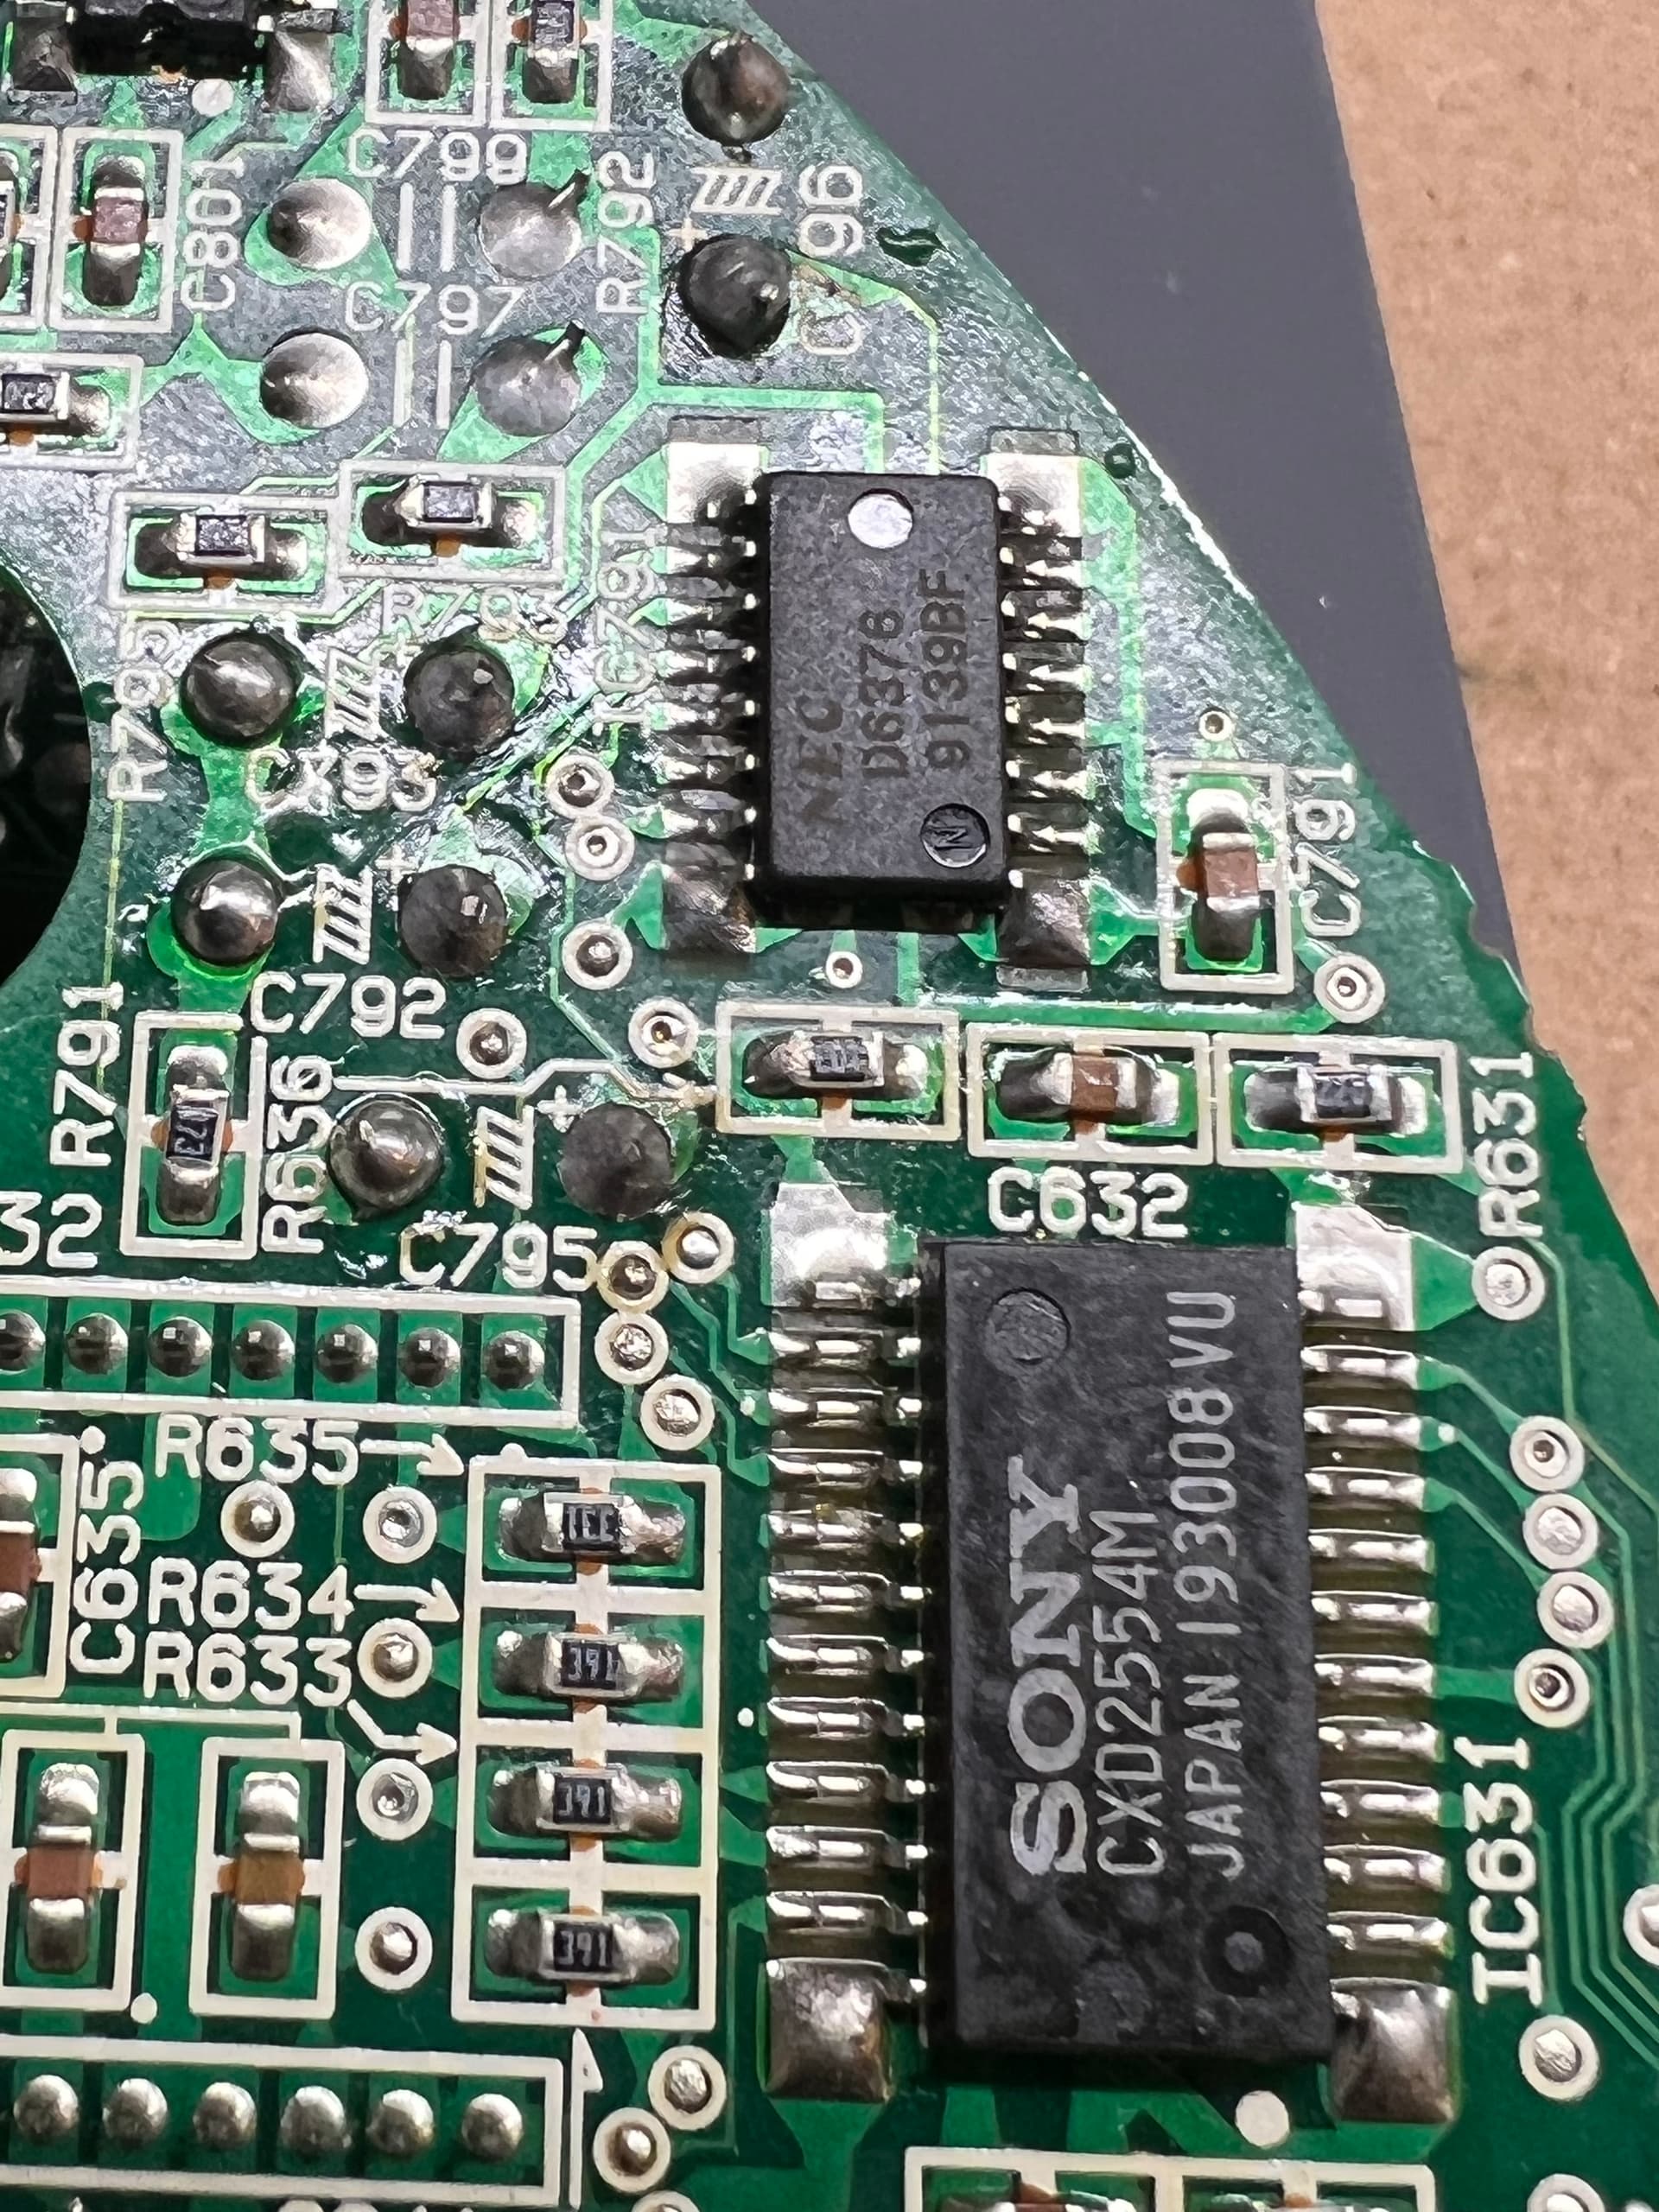
I’d bought a rom cart and upon Aergan’s suggestion used 240p test suite to run audio hardware tests. Everything came up as good so I was able to determine that the problem wasn’t there. Aergan recruited Leo Oliviera and with thier help we determined that the fault had to be with the Ricoh PCM (315-5476a) or the DAC (NEC UPD6376) that converts the digital audio from the PCM into the audio you actually hear come out of your speakers.
There wasn’t even good info on what chip was the DAC. I ended up using my oscilloscope to trace signal from the PCM across the board until I found the chip it was going into. Aergan hooked me up with a link to the console5 tech wiki for the Ricoh chip.
https://console5.com/wiki/RF5C164A
That showed me which pins output the PCM digital audio. (35, 36, 40, and 41) That was how I found out which chip the DAC actually was.
I actually ended up building an audio test probe so I could isolate the Audio from the DAC. I took an old guitar splitter cable and rewired it. I hooked it up to a guitar amp so I could hear the analogue audio right from the pins on the chip.
I was still getting the same audio there as I got out of the AV board. So I knew the problem wasn’t AFTER the DAC. I probed around some more but didn’t have a good frame of reference for what the digital audio should measure as. I thought there may be a fault with the DAC after measuring 5v at the left input at the DAC when the right input measured 1.8v. Leo informed me that I was in luck because that same DAC can be found in Super NES consoles. I just happened to have a few parts units on hand. Time to get back to it!
The DAC
Removal was a huge challenge. The chip was actually glued down and the old pads all wanted to come up.

Luckily everything was easy to get hooked back up. 1 small bodge wire was all it took.

Aaaaannnnnnd… no dice. Still getting the same audio on the scope, the audio probe, and the AV board. So the problem HAD to be with this guy…

I happened to remember that I have an old model 1 Sega CD unit lying around with a busted disc drive… so I cracked it open and what do you know. It uses the same chip! So I got out the hot air station and pulled the 315-5476A chip.

Time to pull the bad one from the Wonder Mega. First thing I did was put down some Kapton tape to protect the other components in the area.

Then I pulled the old chip. This one came out muuuch easier.

A little solder and a lot of flux later and this is how we were looking.

the only thing left to do then was cross my fingers and hope that I’d FINALLY gotten to the bottom of it.
This was the video that I sent Sapiens next.

I can not tell you how relieved I was to have finally solved it! I’d told Sapiens that this project was my “white whale.” For a while it felt that way but after finally getting it I felt like a million dollars. Bloodborne boss defeat levels of accomplishment feeling on this one.
Man. I learned so much in this one. Really felt like my skill leveled up. And what an incredibly cool piece of hardware to get running good as new again.
Double extra thanks to Sapiens for being so patient and cool while I worked this one out. The Wondermega is currently on its way back to him.
I love this community. I stand by my statement that it’s the best retro gaming community on the internet. It really is.
This will probably be my last retro modding/repair post for a little bit. I’m getting ready to move in January. I may have time to squeeze in an SA-1 conversion video that I’ve been planning for a while but if not it’ll probably be the spring before I have my new shop set up. Either way I’ll be doing more of these. I just love getting to work on this stuff for you guys.
Cheers!