The most useful IDE Optical Drive ~ A Hitachi GDR8163B Repair:
For those of you that are not aware, it is actually possible to dump Gamecube and Wii games on a PC using RawDump if you own one of a few very specific models of LG/Hitachi IDE optical drives.
While a few other LG/Hitachi optical drives have been found to work in general you are only guaranteed success with the the following models and even that may depend on the firmware installed on the drive:
LG GDR-8161b
Hitachi LG GDR-8162b
Hitachi LG GDR-8163b
Hitachi LG GDR-8164b
Full list of tested working/failure drives for this purpose can be found here.
The other use of specifically the Hitachi GDR8163B Optical Drive is that it can also be modified to work as a replacement Original XBOX drive (See here).
I’ve had a working Hitachi HL-DT-STDVD-ROM GDR8163B0B26 drive for the purpose of dumping my own discs in my Windows XP PC for quite a while now.
However, I had ended up with several other Hitachi IDE drives salvaged out of junk PC over several years and finally got around to looking through them to test if any of them would work.
Almost everything was failure however there were two drives that had potential:
A highly likely to work Hitachi HL-DT-STDVD-ROM GDR8163B0F21:
and a much less likely Hitachi HL-DT-STDVD-ROM GDR-H30N:
The Hitachi HL-DT-STDVD-ROM GDR-H30N as expected didn’t work.
So I moved to test the GDR8163B0B26 which I already knew had a faulty drive belt because the disc drawer would not open.
If you look carefully on most optical drives you can find a small hole underneath the drive door which I have circled in the picture below:
By inserting some long and thin into it you can force the drive open:
I could now pop in a disc, however to my dismay I found the drive would not read any optical media.
So I decided to open up the drive to see if there was anything I could do.
To do so I had to pop the drive drawer back open again:
With this now open you can find some tabs to the sides that hold the front panel in place:
With a careful little prying you can pop the front panel off:
Then flip the drive upside down and unscrew the 4 screws:
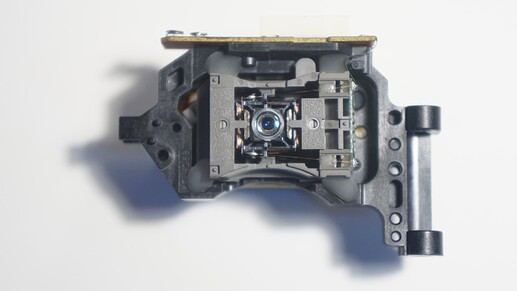
After being flipped back the right way around you can then just lift up the metal casing and we can take a closer look at the laser which has the model number: SF-HD68
Out of curiosity I decided to open up the worked (but no good for game dumping) GDR-H30N and find it has an almost identical laser but with the model number: SF-HD68 V2 and the only difference I can spot is that the plastic piece that connects to the drive shaft is fastened to the bottom of the laser instead of the top:
I decide to attempt to swap these lasers, so going back over to the GDR8163B0B26 I need to remove the two black screws circled below:
DO NOT adjust or remove any of the other screws or you will enjoy the pain of having to try to re-align the drive and you really do not want to have to do that!
You can now pop off that metal plate, disconnect the flex cable and lift up the left metal guard rail to easily remove the laser housing:
With the laser now removed the white plastic piece is detached:
I then remove the other laser and remove it’s bottom connected white plastic piece:
Thankfully these plastic pieces are interchangeable between both models of laser, so I swap it over to the working laser and then place it into the GDR8163B0B26:
Before closing everything back up I replace the drive belt.
Now I can test the drive again:
And the drive is working again!

So it would seem the lasers found in the newer not compatible (also not sought after) Hitachi “GDRxxxx” optical drives can be used to repair a dead laser in a good Hitachi “GDR8163B” DVD-ROM.
Good to know!
Excuse some wonky and not the most ideally suited photographs in this post as when I started I thought I was just going to be doing a simple drive belt replacement… So they were taken after most the work had already been done.


