Replacing the Mega CD Internal Battery:
In the previous post a few of you might have wondered why I didn’t have any mention of replacing the soldered in ML2016 T25 rechargeable battery (25 mAh).
There is a good reason for that and I wanted to create a separate post dedicated to the Mega CD internal Memory and rechargeable battery circuit.
Unfortunately ML (Lithium Manganese Dioxide) type rechargeable batteries are no longer produced and even worse the ML battery charging circuit is not compatible with the available alternatives (LIR and VL).
This leaves us with EOL stock that is running out and has a shelf life of about 10 to 20 years.
ML2016 T25 “tabbed” batteries are already very difficult to find in the wild with non tabbed ML2016 batteries being a little easier to find but getting expensive and require a 16mm coin battery holder that are not themselves that common either.
ML2032 non tabbed batteries on the other hand (which are used in Dreamcast consoles) while also EOL still have a fair amount of stock available in the wild and is the same size as the common CR2032 so a coin battery holder is easily obtain cheaply.
ML2032 batteries also have a higher 65 mAH capacity so they will last longer between charges.
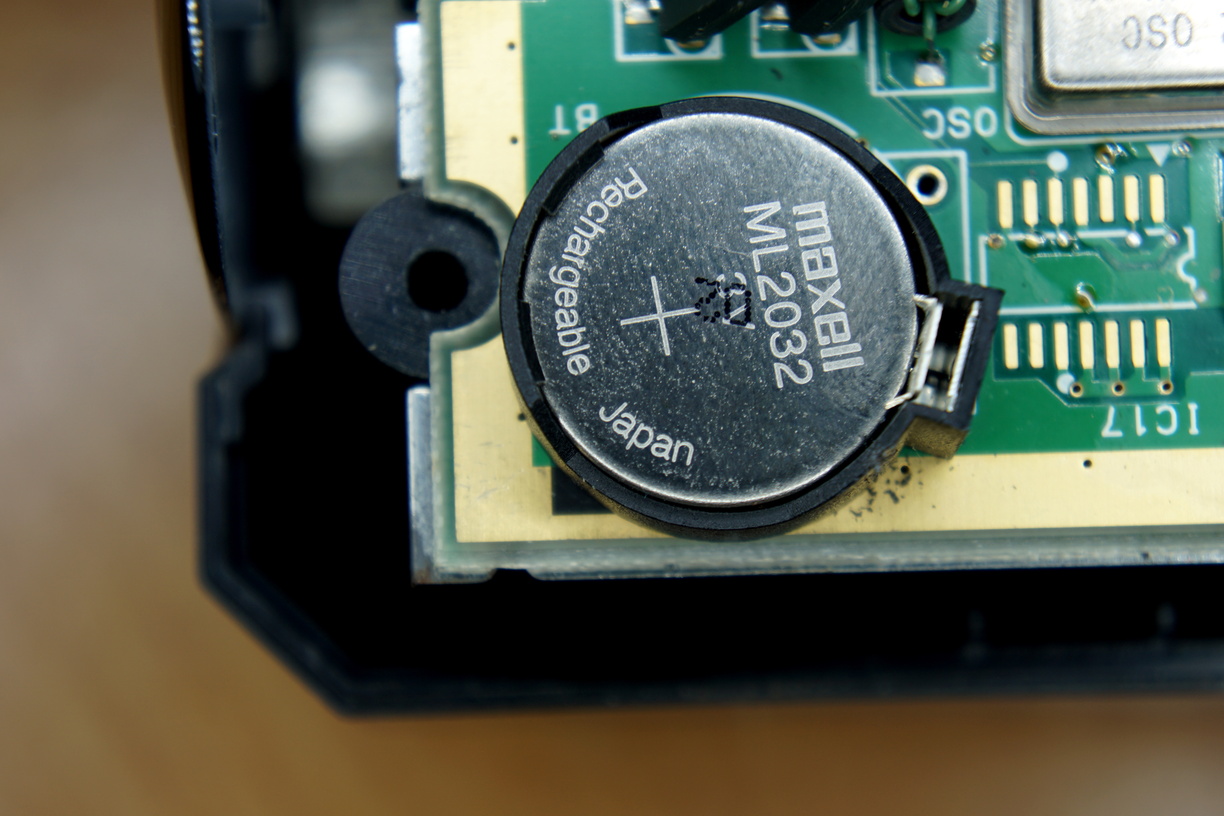
So I bought some ML2032 batteries and soldered in a CR2032 coin battery holder:
NOTE: It doesn’t matter if you can’t solder the positive terminal of the battery holder into both the old T25 positive via’s on the PCB. You only really need one to be connected.
Due to the lack of space around the position of the battery on the PCB it is likely you will need to cut away a little bit of the metal shielding to get it to sit flush again:

In the future when the stock of ML batteries is exhausted we will need to use a diode to disable the charging circuit and then use CR2032 batteries which don’t look like they will be disappearing any time soon and having a compatible battery holder in place already is nice.
SEGA Mega CD Internal Memory Repair:
Initially my Mega CD was saving to internal memory just fine but a few days of use later my saves were gone and the ML2032 battery I had inserted was exhausted.
After placing in a new battery the internal memory was incorrectly reporting it had 21885 blocks of free memory:

But it was refusing to format or save:

When I opened up the Mega CD and was able to test the battery with my multi meter while it was turned on I found that the battery was not charging at all and was draining at a rate of 0.01v per second.
THIS IS NOT NORMAL!
The battery charging circuit was obviously not working.
The Fujitsu MB3790 at position IC6 is responsible for providing power to the SRAM and for charging the ML battery and upon closer inspection of this IC we can see the top of the IC is burnt which is a common sign that the IC has gone bad and is over heating:

However, even without a battery, while the system is powered on we should still be able to temporarily save to the internal memory so it is likely that when the charging circuit went bad it also damaged the SRAM which is a Fujitsu MB8464A-10L.
In the arcade domain Fujitsu IC have a bad reputation of going bad after decades of use and unfortunately for us SEGA decided to use a lot of Fujitsu chips within the Mega CD.
The SRAM used by the Mega CD for internal memory is located at position IC16 and is a 8192x8bit (64Kb) CMOS SRAM in SOP28 form factor with the following pin out:

Since I wanted to find a more reliable non Fujitsu replacement for the SRAM, using the pin out above I was able find a suitable compatible replacement Hyundai HY6264ALJ-10 SRAM to purchase.
Using my hot air station I removed both IC6 and IC16:

The removed faulty IC:

Using de-solder braid I then cleaned up the left over solder from the pads:

I then carefully placed the replacement SRAM IC in position with tweasers:

Using a T18-C2 soldering tip I tagged down the top right and bottom left corners of the IC to hold it in place:

This was repeated for the IC6 replacement and then using drag soldering both IC’s were soldered down:

Complete view of the PCB with the new IC in place:

After re-assembly the ML battery now charges correctly and the internal memory now fully functions properly:
