I was gonna start a thread like this, but I’ve been so busy recently
I’ve done quite a few mods myself (nesrgb, crt rgb mod, optical audio mods, gbc backlight, mega drive rgb bypass board, etc) and I’ve got a bit of a blog to record them here: https://richretro.wordpress.com/
I’ve got an UltraHDMI board on order - the boards will be shipped out later in Jan, so I’ll post updates on it when I get it. Installation doesn’t look too bad - but that’s only because I’ve grown quite confident with soldering.
also holy fuck at that video above. My golden rules as a modder:
no hot glue unless ABSOLUTELY necessary. And in that case, why not use two step epoxy?
use kapton tape instead! it’s rock solid, easily removable, thin as fuck and totally insulating. In all my mods I used standard electrical tape to begin with as a temporary hold, then used kapton after.
document everything
make sure EVERYTHING is reversible. Need to cut a trace or lift a pin? Add a switch or a circuit that allows it to be reverted.
I sold my RGB modded AV Famicom on ebay the other day to pay for the Analogue NT Mini I bought (no regrets - incredible console!!!) And I wouldn’t feel comfortable selling it unless I knew it was a 100% decent mod job. Same for anything else I’ve sold in the past.
EEVblog videos are pretty good. I also recommend all of the Voultar how to videos on youtube. Aside from that, find a practice breadboard - and practice! That is what is going to help you the most.
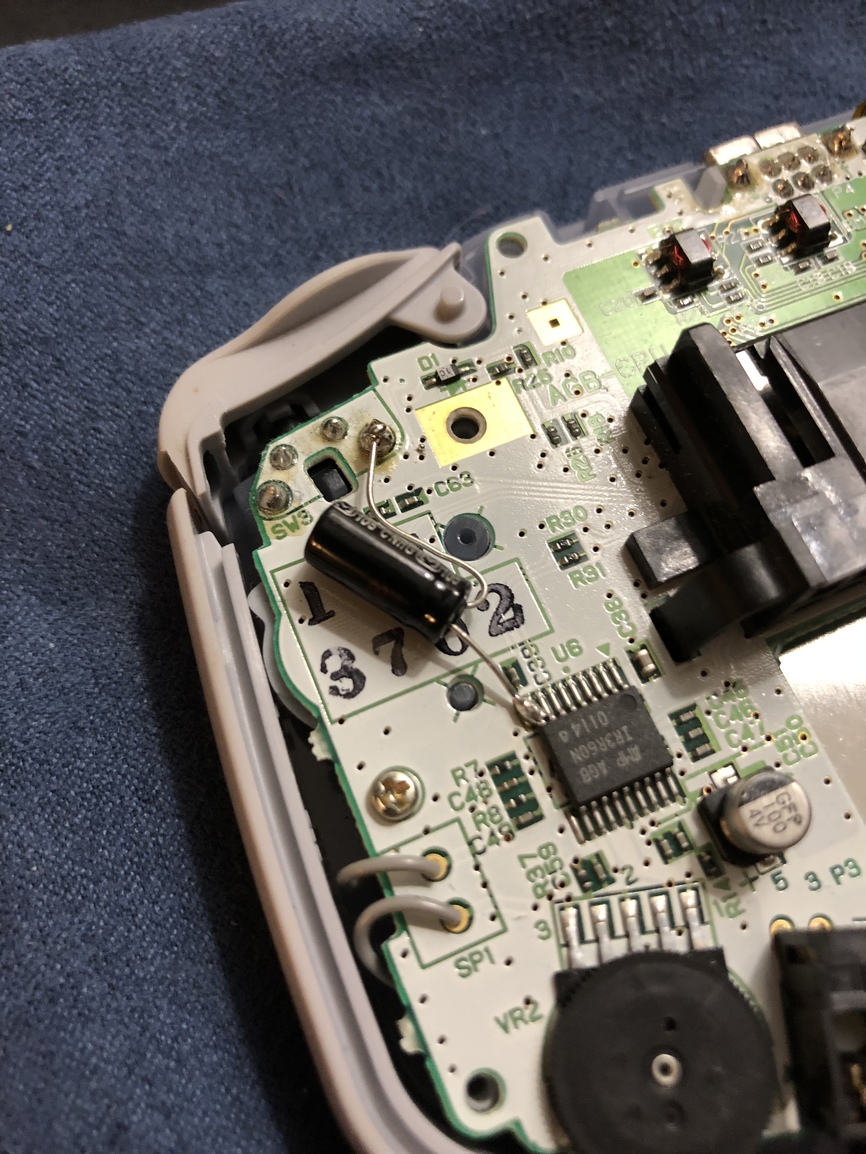
I just did a small mod today: took my already modded backlit GBA AGB-001 and added a 100uF 16v capacitor to the sound amp chip (and ground) in order to remove the low frequency buzzing from the audio. It worked! This thing sounds really nice now.
Region modded my Mega Drive the other day. Man that’s such a simple mod, at least on the MD1. The switches I ordered were a little too thick though, so I can’t mount it to the side… doh! Ordered some other ones that I made sure to check the dimensions of. In the meantime I just routed the wires through the air vent and soldered onto the switch haha.
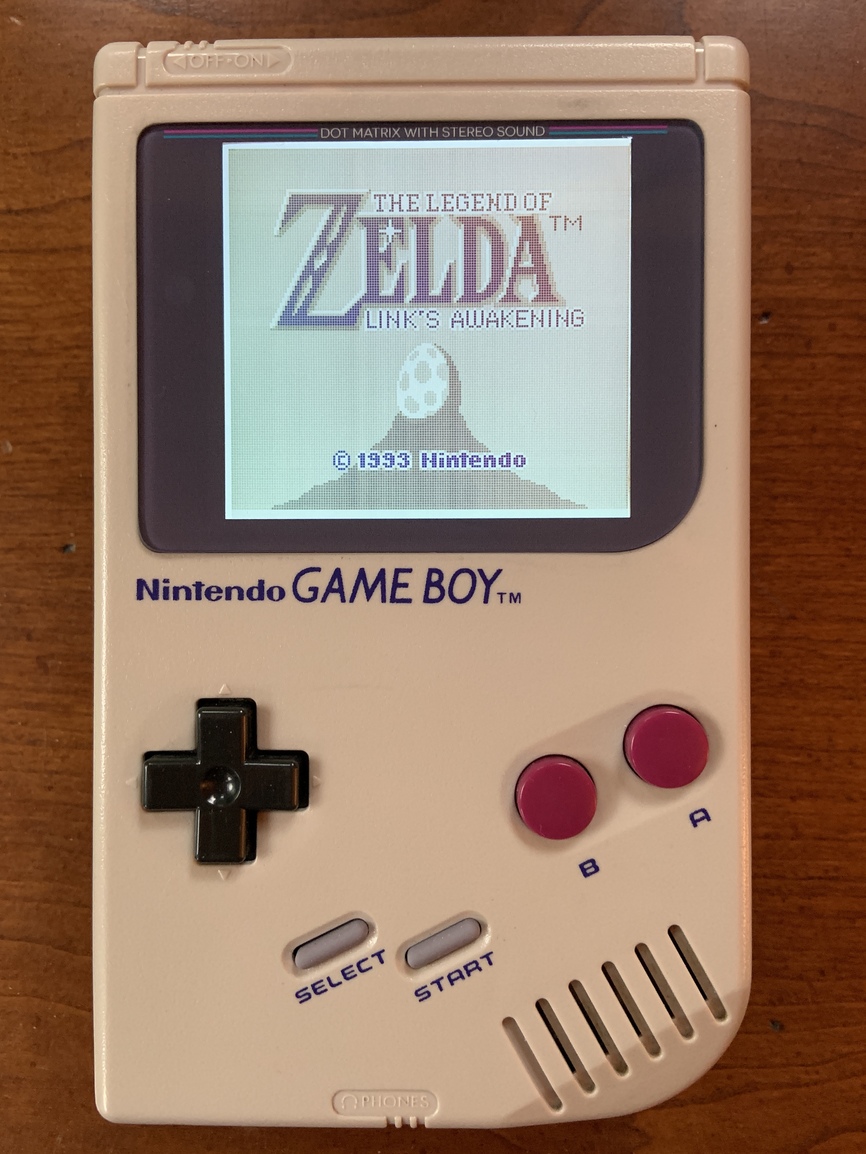
Nodded my Super Gameboy with qwertymodo’s awesome clock-mod board and link port. The clock mod was a breeze. The link port was much more challenging but manageable. Had to learn to drag-solder. Got it all hooked back up and discovered that the sound caps were bad. I’ll be replacing them later this week. Now it’s as good as a Super Gameboy 2!
I heard about it from Bob at RetroRGB. When I looked into it it seemed simple and I wanted a project to do. Now I want to buy a bunch of good Gameboy games to try out!
Got the audio caps replaced tonight. Careful if you do that. There’s a tiny almost undetectable hole below the right audio cap you have to solder to. I ended up using a small jumper and it worked out great. Now it’s all tricked out… I suppose I could do a line-level audio mod if I wanted to get crazy.
Yeah, there was basically no audio coming from the Gameboy games. If I cranked the gain on my mixer I could hear a little bit of audio but it was more line buzzing than anything else. The Audio from the Super Nintendo was fine though. Figured out it was the audio caps. Now that they are replaced it sounds great! Full volume no problems.
I’m desperate to get an original famicom RGB modded or red sharp twin,I think that would be so cool. All you ever see are top loaders. I asked Voultar about doing it but he said no
I was given an early Father’s Day treat and had a totally quiet/empty house for a couple hours this afternoon, leaving me with a chance to finish up my BennVenn 3" DMG project.
For the most part things went smoothly, but I had the hardest time getting the LCD attached to just the right spot. Jellybelly Custom’s glass lens seemed to have things shifted over slightly and I didn’t have much wiggle room - I must have reglued the LCD at least 3 times before finally calling it “good enough”.
The other tricky part was discovering that if I screwed the PCB too tightly, the dpad and buttons would act up (B button and UP would get stuck on autofire)
I also realized too late that I hadn’t cut enough away from the case and a tiny sliver of white could be seen on the side when the screen was off. I made things slightly worse by trying to do a little “touch up” and nicking a bit of the lens…fuuuuuuuuu…
Anyway, when it was all over I was really pleased with the screen - as long as the images are static. Once there’s any motion, the blur seems very bad to me. I knew going in that there was going to be some motion blur, but the videos and comments gave me the impression that it was comparable to the original screen. Sadly, I disagree and think it’s actually a bit worse.
Not sure what my next step will be. I really prefer the chunky feel of a DMG loaded up with 4 batteries and I was hoping this could give my GBC a run for its money. But the screen just isn’t up to the task. Perhaps I’ll revisit the backlight/bivert and try again with another unit.
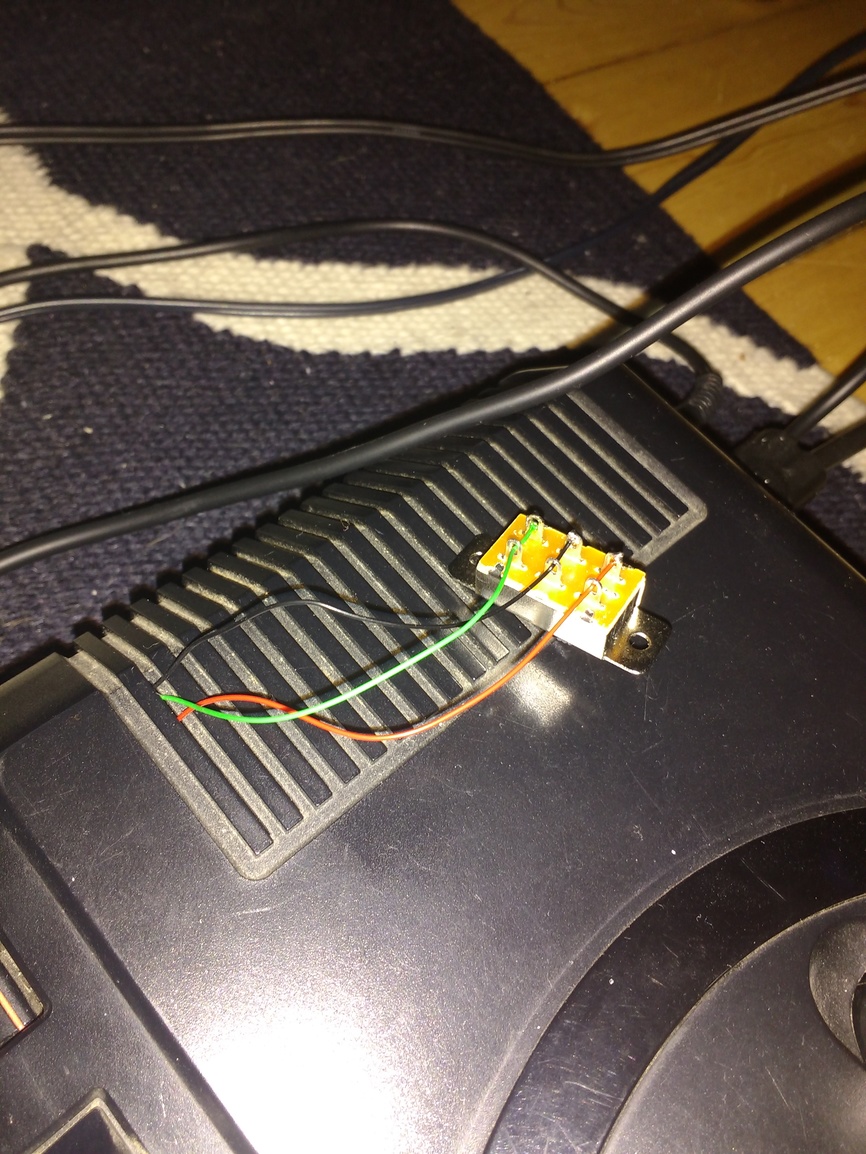
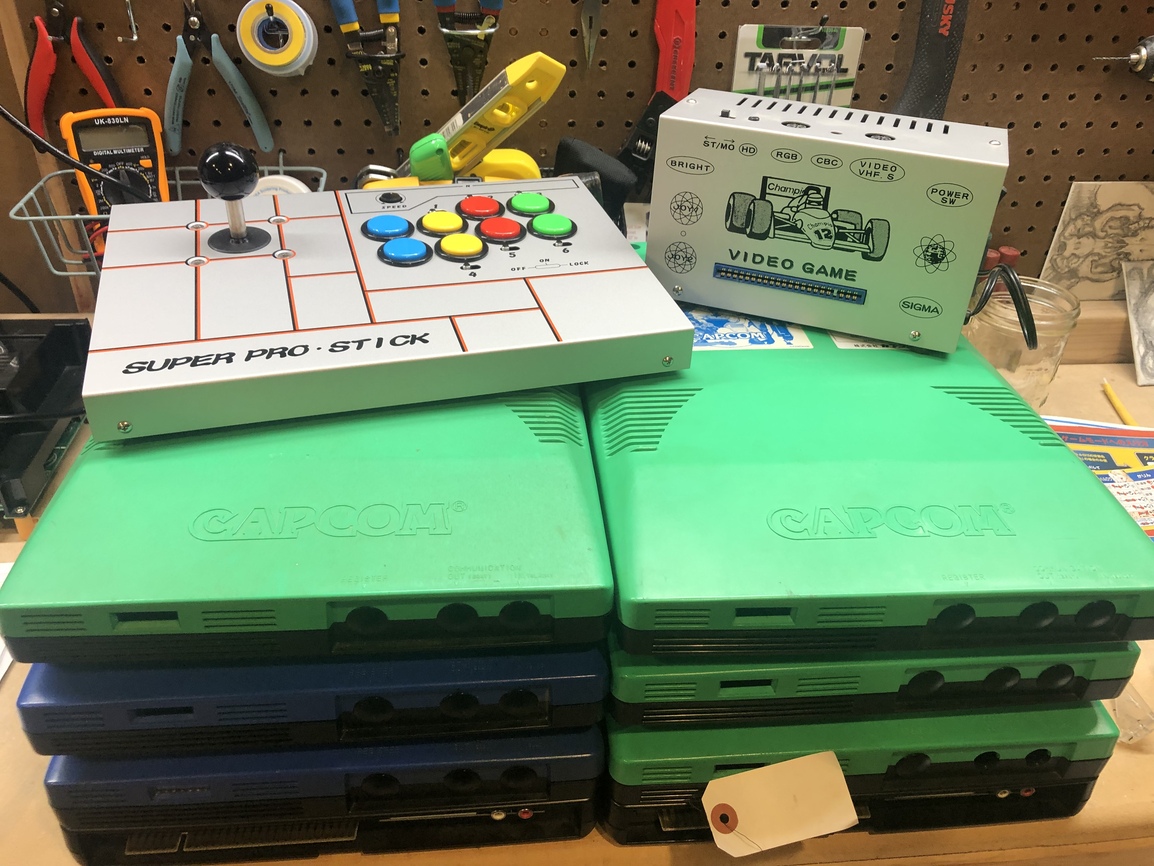
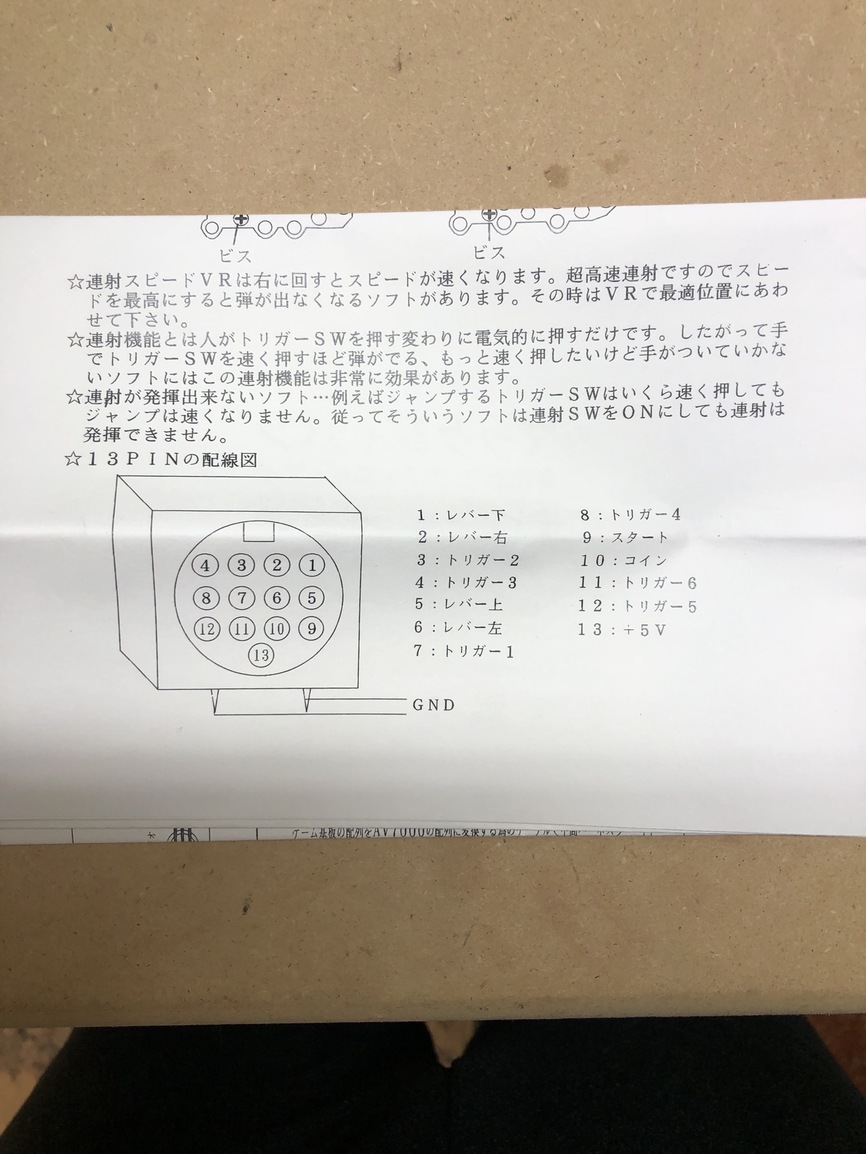
I recently posted about a haul of arcade boards that I found at a local game store. In that lot was also a Japanese supergun I’d never heard of. Turns out it was a Sigma AV 7000 with a 9000TB arcade stick.
I got it running with s-video and tracked down the super weird 13-pin din cable the controller uses. Thing is I already have a super nice H.A.S supergun and I wanted to try out this stick with it. The H.A.S uses Neo-Geo DB 15 connectors. Time to make a new cable!
Luckily the sigma came with a pin-out diagram. Glad google translate works so well!
I used a multimeter to figure out which pins corresponded with what wires. Then I used a Neo-Geo controller pinout to figure out which wires to hook up.
After I got it wired up I hooked it up but something was wrong. I had controller inputs but they were all on the wrong buttons. Up was punch, kick was move right, etc.
Turns out I’d wired it up according to the port and not the wire pins. I flipped it around and rewired it and it worked flawlessly!
Anyone have any recommendations on a good soldering iron and tip size for modding consoles/handhelds? I got 2 irons but both - I believe - aren’t approriate for console/handheld modding. The tip of one of them is too big and its too powerful. The other iron I got is a usb-based soldering iron that has a nice tip but I don’t believe it gets hot enough as the solder barely stays when I use it.
Also, got a question about upgrading a GBA with a backlight. Is it possible to upgrade a GBA with a backlight without having to file-down the outer front shell to accomodate for the size of the backlight?
Coming from a little 35 watt Weller that I have, I ended up hating it because I could never get it hot enough to do the work I need. I bought a Hakko FX888D, and I absolutely love it. You can replace the tips with whatever you need, but I found the one that comes with it is pretty good for most modding work.
It heats up from cold to 800F in about 10-15 seconds, it’s astoundingly fast.
That looks like an awesome piece. Enjoy! I’m using one of the KSGER units that Voultar recommended and have been happy with it. Yours is like a Cadillac though!