The progression in the design of the custom parts/components is pretty great. We are a long way from the days of tons of wires and having to cut up cases just to make things fit. Has helped a lot in various handheld modding, but also made it even possible for the super compact/dense systems like the Wii.
I have ordered a couple of snap-fit SNES multi-outs from Laser Bear. Really solid quality stuff. I may end up grabbing one of these from him in the future!
I’m excited to see inside of it myself since it is the one of like 2 of my second hand consoles that I have not taken apart to clean.
Edit: Also another way to telling what model revision you are getting from just seeing online listings is if the text on the front is vertical or horizontal along with the color of the system. For instance all black, red, or light blue systems that have the vertically oriented text will be a cpu 40-60. Whites can still be an earlier revision that can’t have this particular mod.
Easy to check in person since the revision is visible from that battery compartment, but just a protip for buying online.
The 2nd part of @apathetic 's WiiDual mod vid is up! This is all the fun stuff. This one was a challenge but a lot of fun. Doing the GCDual first definitely helped me get my bearings for this one.
The next vid will be further testing and modification to the case its self.
Unfortunately because some dumb shit happening at work that I’ve had to deal with the last two weeks I haven’t been able to do a damn thing with the system itself aside from starting my testing of it. So I hope I will be able to get back to that soon as well.
Yeah, I’m not sure why the RF module didn’t come off after desoldering the five pins there. It isn’t super hard to get the module off the other way. Really just more time consuming.
A desoldering vacuum is super handy. I still use a fair amount of braid but the vacuum makes doing stuff like this so much easier. I’ve been debating throwing down the fliff for a Hakko.
I’ve refurbed and repaired a handful of eBay parts/repair units. It’s a ton of fun when you get one to work!
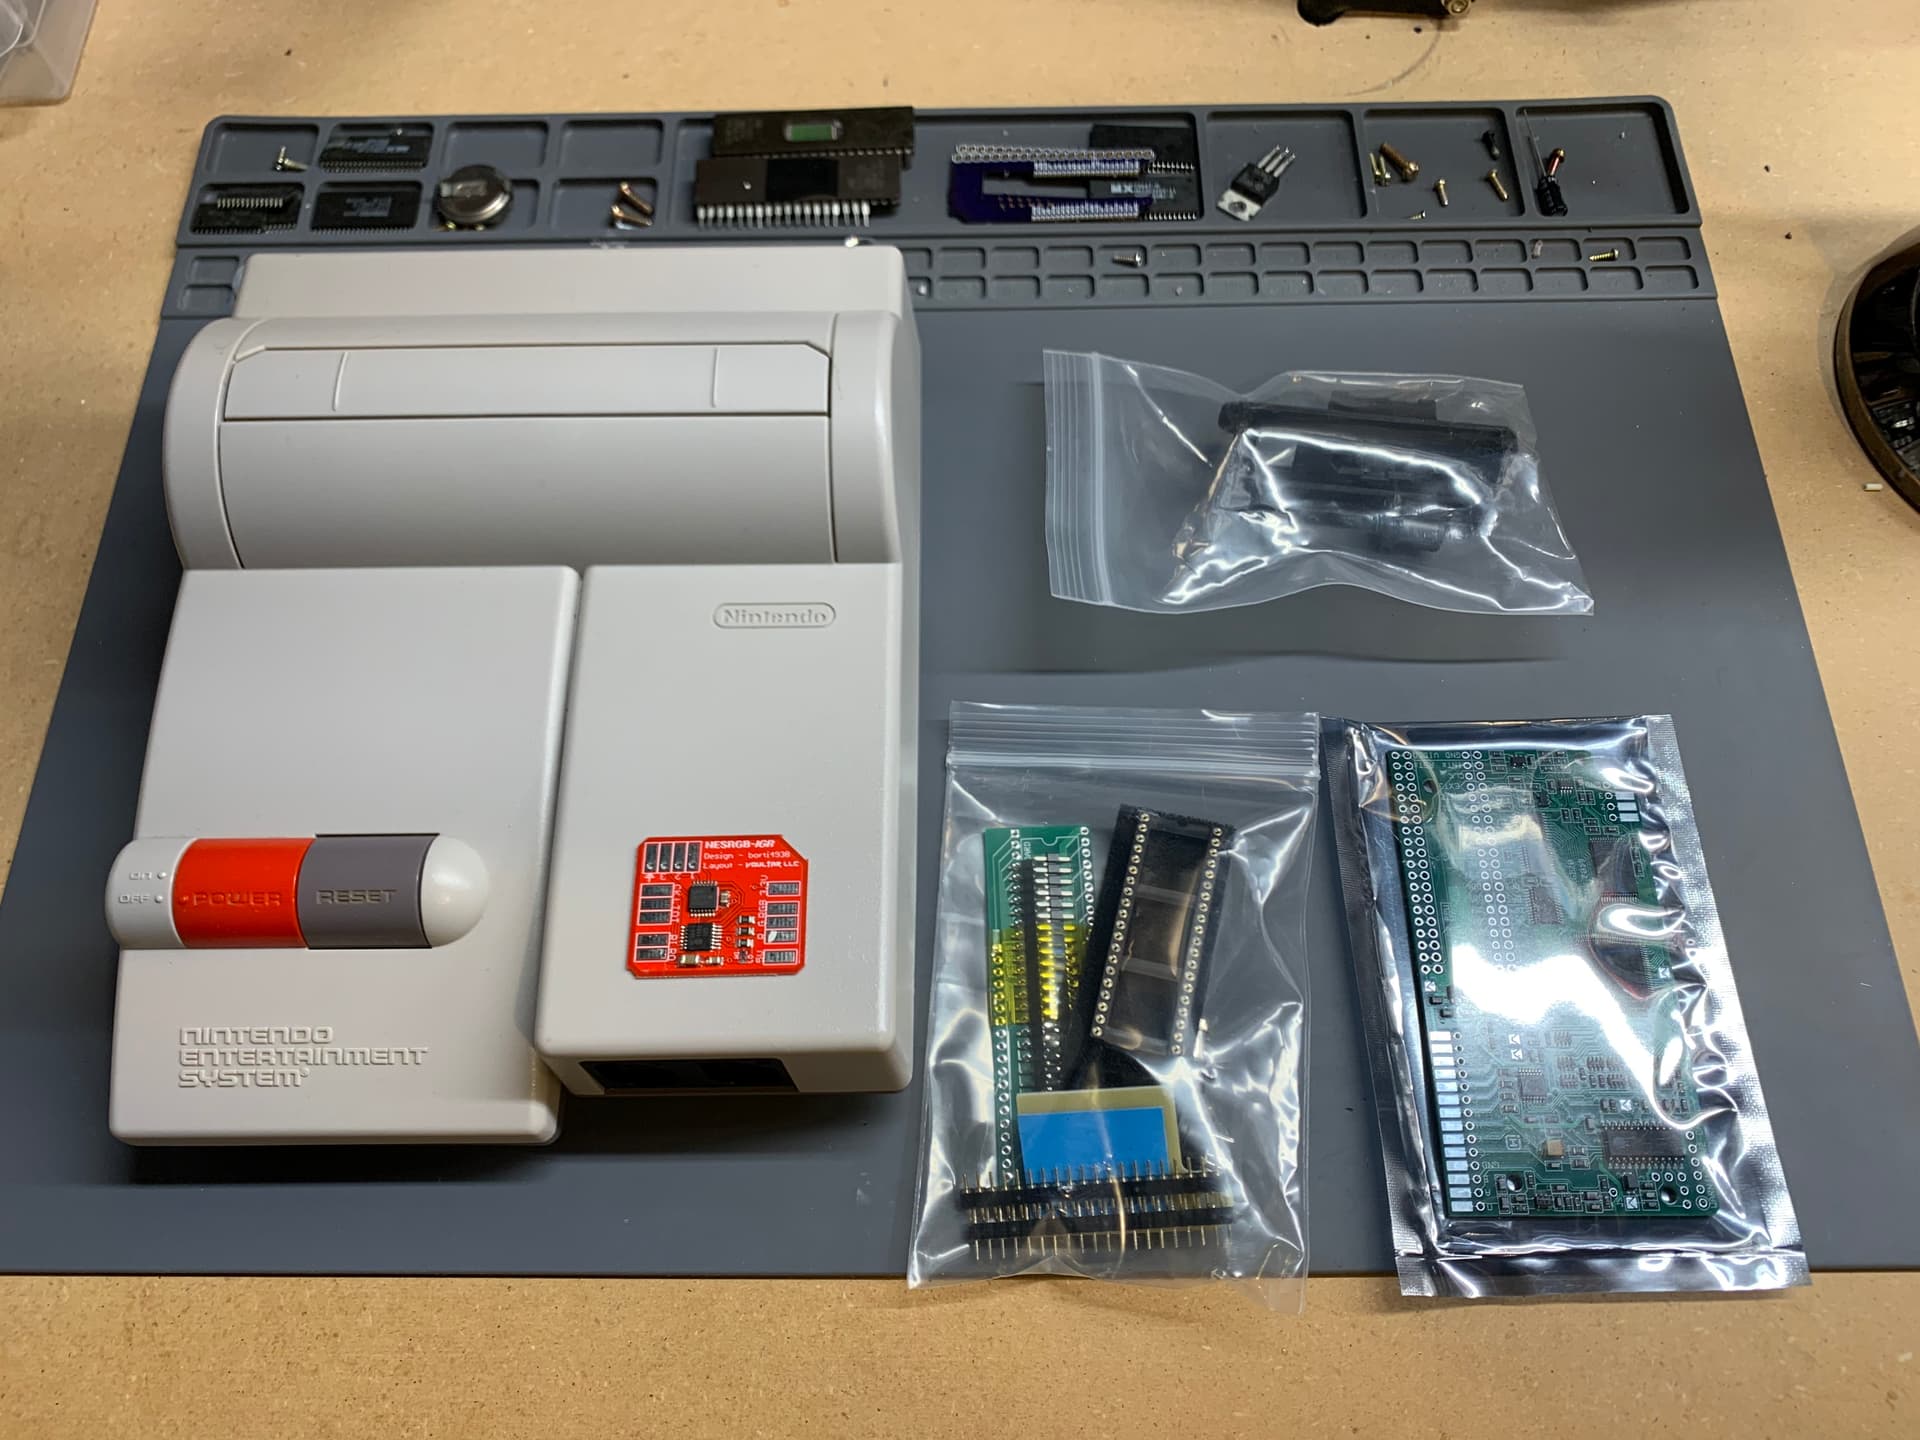
Hey! It has been a while but I finally got Part 2 of my NESRGB Install uploaded. This one covers removing the PPU and prepping the RGB board. This video has been my biggest one to date. Lots of details to cover!
Thanks! Definitely more to come. Things have picked up like crazy at my job so I haven’t had any time to do mod work lately. But when things slow down there I’ll be back at it.